|
Size: 1571
Comment:
|
Size: 2095
Comment:
|
| Deletions are marked like this. | Additions are marked like this. |
| Line 1: | Line 1: |
| === Instructions for using the Logitech Rally AV system in the Kresge Room === The Logitech Rally AV system is used for hybrid meetings and includes a video camera, microphone array, and speakers. Remote attendees will be able to hear everybody in the Kresge Room and view the projection screen/whiteboard through the ceiling mounted camera. |
== Instructions for using the Logitech Rally AV system in the Kresge Room == The Logitech Rally AV system is used for hybrid meetings and includes a video camera, microphone array, and speakers. |
| Line 4: | Line 4: |
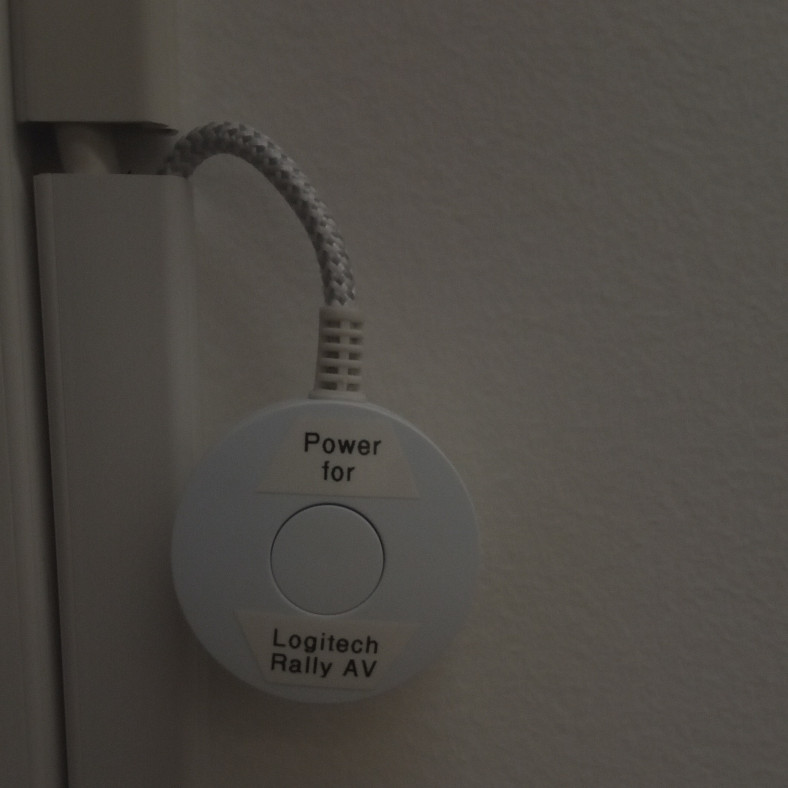
| ==== Using the system ==== 1) Turn on the power to the Logitech system by pressing the power button on the wall ONCE: |
'''Remote attendees will.... ''' ...be able to hear everybody in the Kresge Room via the microphone array... ...be able to view the projection screen/whiteboard through the ceiling mounted camera... ...be heard by local attendees through the ceiling-mounted speakers === Using the system === 1) Turn on the power to the Logitech system by pressing the power button on the wall '''once''': |
| Line 9: | Line 17: |
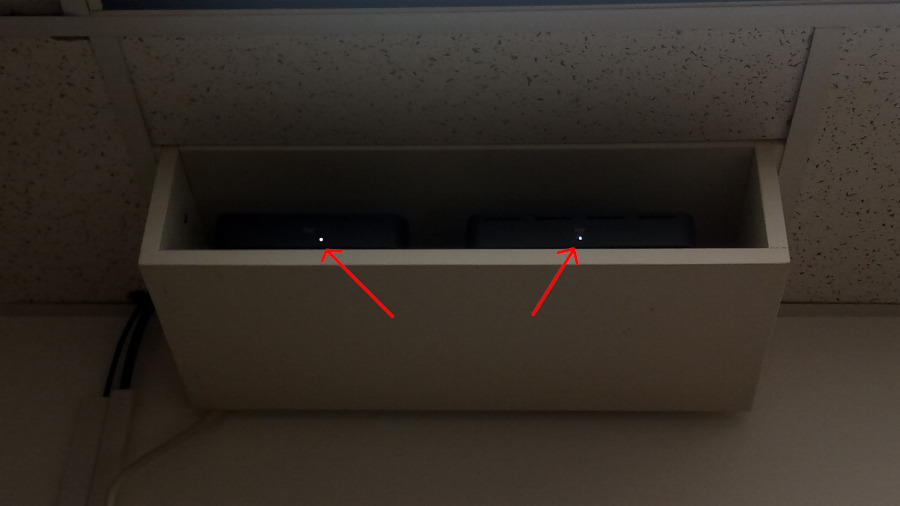
| 2) After a few seconds, look at the shelf above the power button where the system's controllers reside and see if the two power lights are on. If they are, system is on: | 2) After a few seconds, look at the shelf above the power button where the system's controllers reside and see if the two power lights are on (they may be on solid or blinking). If you can see them, the system is on: |
| Line 13: | Line 21: |
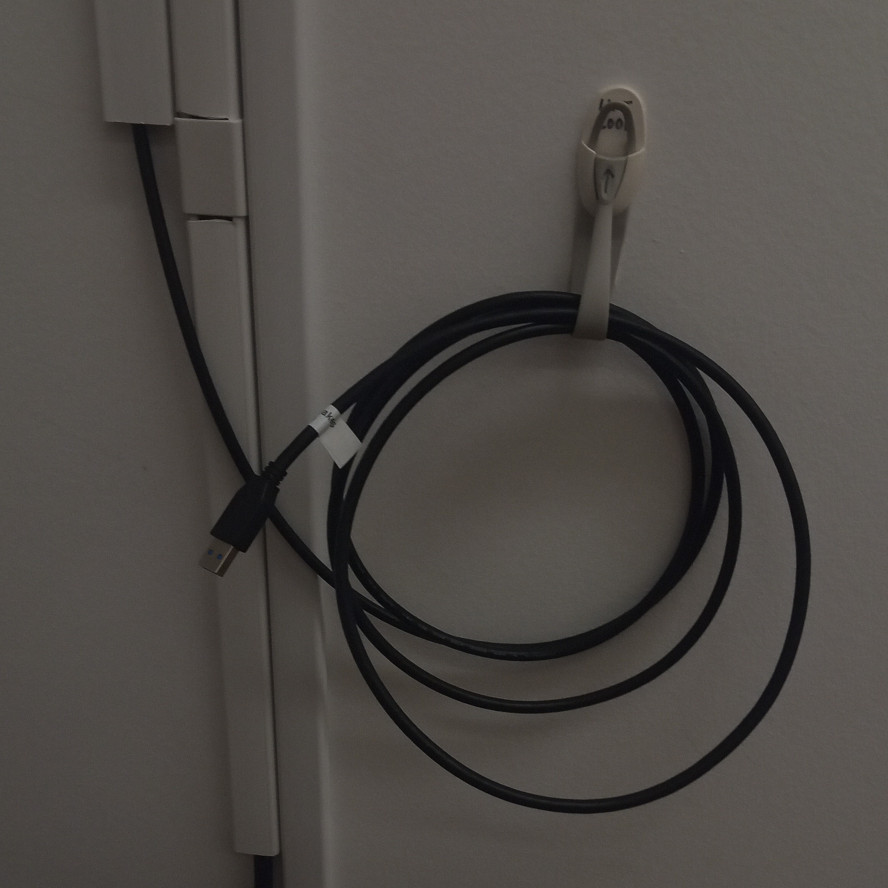
| 3) Connect the USB cable to your laptop (or the laptop from the podium if using that). This one cable provides microphone/speaker/camera connectivity: | 3) Connect the USB cable on the wall to your laptop (or the laptop from the podium if using that). This one cable provides microphone/speaker/camera connectivity: |
| Line 17: | Line 25: |
| '''NOTE:''' The Rally system does not handle local video...you must connect the HDMI cable on the wall to your computer if you want to display video on the projector | '''NOTE:''' The Rally system does not handle local video...you must connect the HDMI cable on the wall to your computer if you want to display video from your computer on the projector |
| Line 19: | Line 27: |
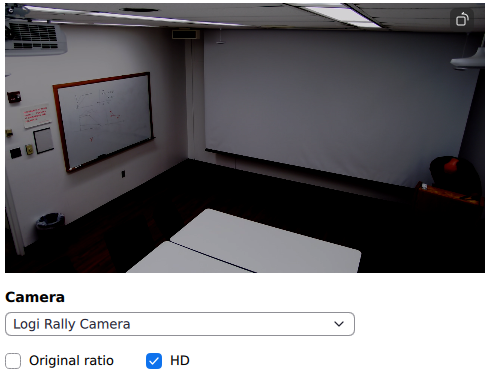
| 4) In the settings for your videoconferencing app (presumably Zoom), set the video/microphone/speaker device to be "Logitech Rally" | 4) In the settings for your videoconferencing app (presumably Zoom), set the video/microphone/speaker devices to be "Logi Rally" (actual name varies by OS): {{attachment:camera.png}} {{attachment:audio.png}} |
| Line 29: | Line 41: |
| Presssing the "1" button will have the camera automatically zero in on the projection screen. | Note that the button labeled "1" in the above picture should never be used. |
| Line 31: | Line 43: |
| Pressing the "2" button will have the camera automatically zero in on both the projection screen and the whiteboard. | The buttons labled as "9" in the above picture are presets for the ceiling mounted camera...1 will have the camera automatically zoom in on the projection screen while 2 will have the camera automatically zoom in on both the projection screen and the whiteboard. == When done using the Rally system please press the power button again to turn the system off! == |
Instructions for using the Logitech Rally AV system in the Kresge Room
The Logitech Rally AV system is used for hybrid meetings and includes a video camera, microphone array, and speakers.
Remote attendees will....
...be able to hear everybody in the Kresge Room via the microphone array...
...be able to view the projection screen/whiteboard through the ceiling mounted camera...
...be heard by local attendees through the ceiling-mounted speakers
Using the system
1) Turn on the power to the Logitech system by pressing the power button on the wall once:
2) After a few seconds, look at the shelf above the power button where the system's controllers reside and see if the two power lights are on (they may be on solid or blinking). If you can see them, the system is on:
3) Connect the USB cable on the wall to your laptop (or the laptop from the podium if using that). This one cable provides microphone/speaker/camera connectivity:
NOTE: The Rally system does not handle local video...you must connect the HDMI cable on the wall to your computer if you want to display video from your computer on the projector
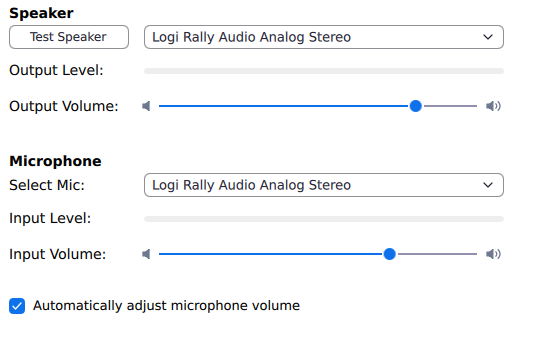
4) In the settings for your videoconferencing app (presumably Zoom), set the video/microphone/speaker devices to be "Logi Rally" (actual name varies by OS):
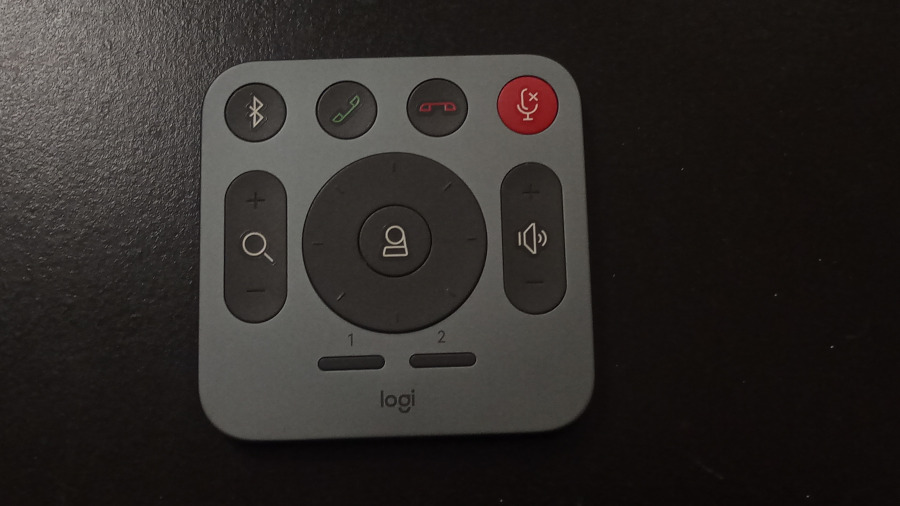
5) The remote control for the Rally system looks like this...
...and here are what the buttons are for...
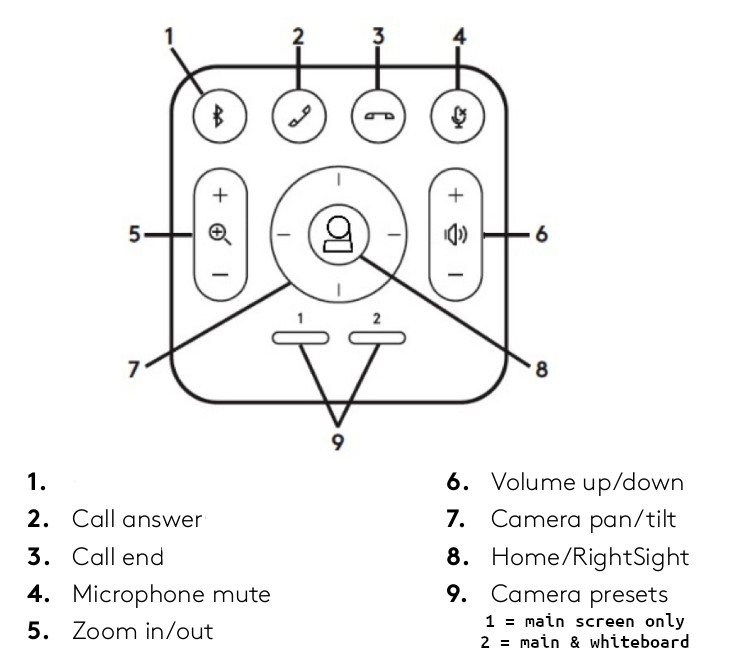
Note that the button labeled "1" in the above picture should never be used.
The buttons labled as "9" in the above picture are presets for the ceiling mounted camera...1 will have the camera automatically zoom in on the projection screen while 2 will have the camera automatically zoom in on both the projection screen and the whiteboard.
