|
Size: 587
Comment:
|
Size: 671
Comment:
|
| Deletions are marked like this. | Additions are marked like this. |
| Line 7: | Line 7: |
| At the main O365 screen, click on the gear icon in the top right corner and select "Options": | At the main O365 screen, click on the gear icon in the top right corner and select the "Mail" option near the bottom of the "Settings" list. Select "Clutter" from the list on the left: |
| Line 11: | Line 11: |
| Select "Clutter" from the column on the left, then UNcheck the box on the right labeled "Separate items identified as clutter" | UNcheck the box on the right labeled "Separate items identified as clutter", then click on the "Save" option above it: |
Disabling O365's Clutter feature
To disable Clutter, first login to the O365 Outlook Web Access interface here: http://owa.ur.rochester.edu/
Be sure to login with your full e-mail address and password!
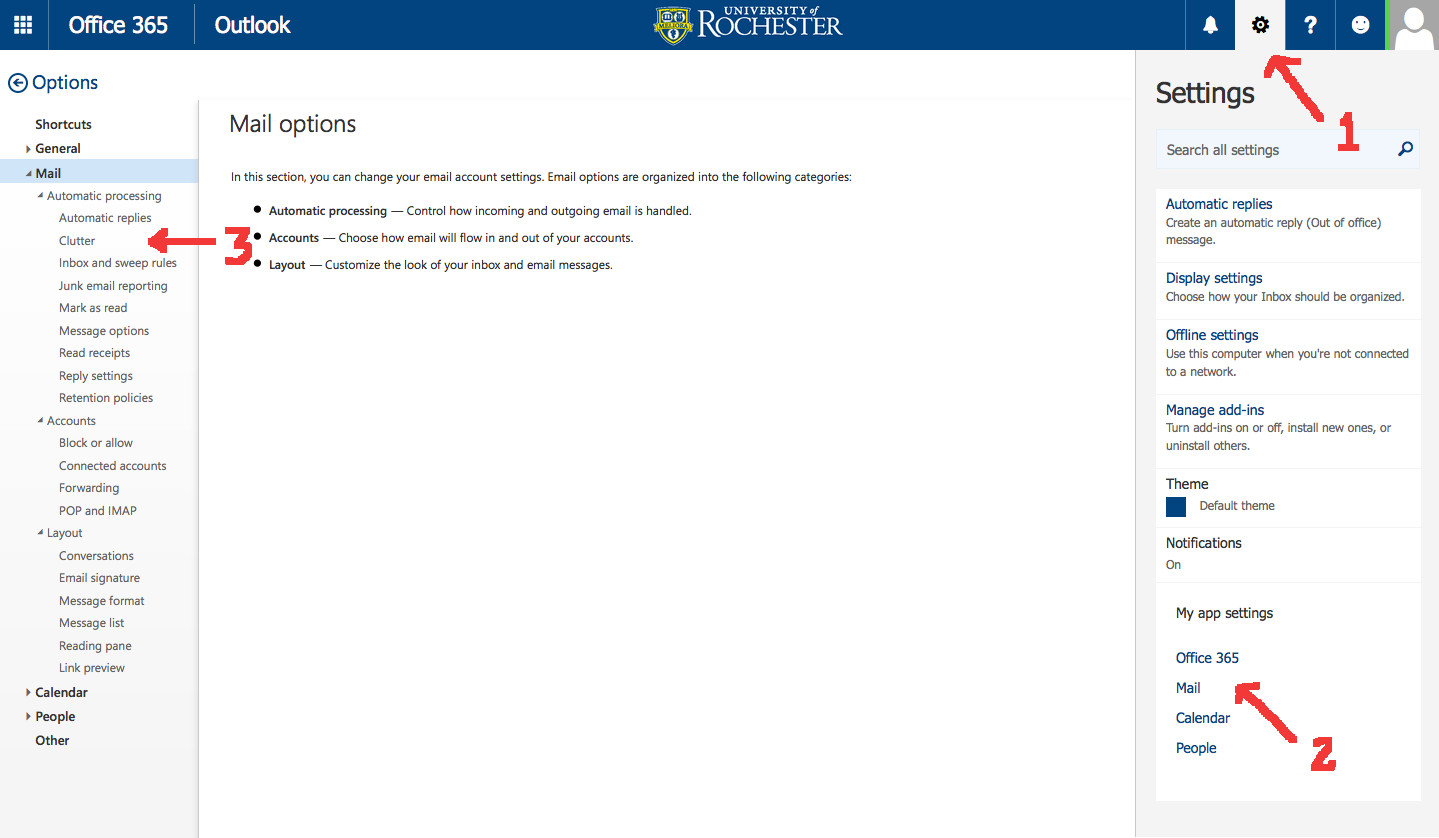
At the main O365 screen, click on the gear icon in the top right corner and select the "Mail" option near the bottom of the "Settings" list. Select "Clutter" from the list on the left:

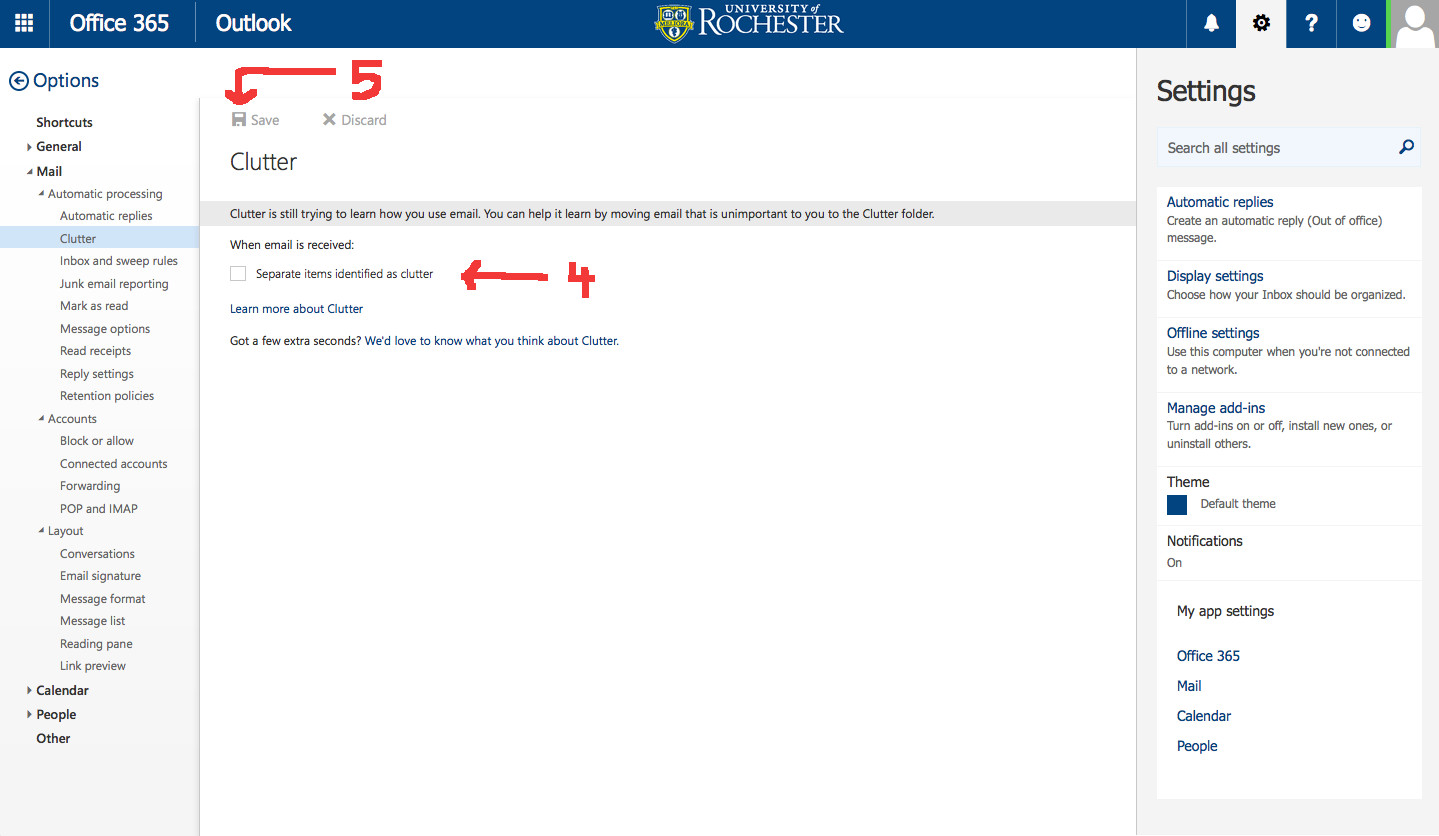
UNcheck the box on the right labeled "Separate items identified as clutter", then click on the "Save" option above it:

Once done, click on the person icon in the top right corner to log out of OWA.
